
24 Hour Service
Call 409-444-0066
Top 5 Common Mistakes to Avoid During Toilet Installation in Port Arthur TX
Avoid these five costly pitfalls to ensure a smooth and successful toilet installation in Port Arthur, TX.
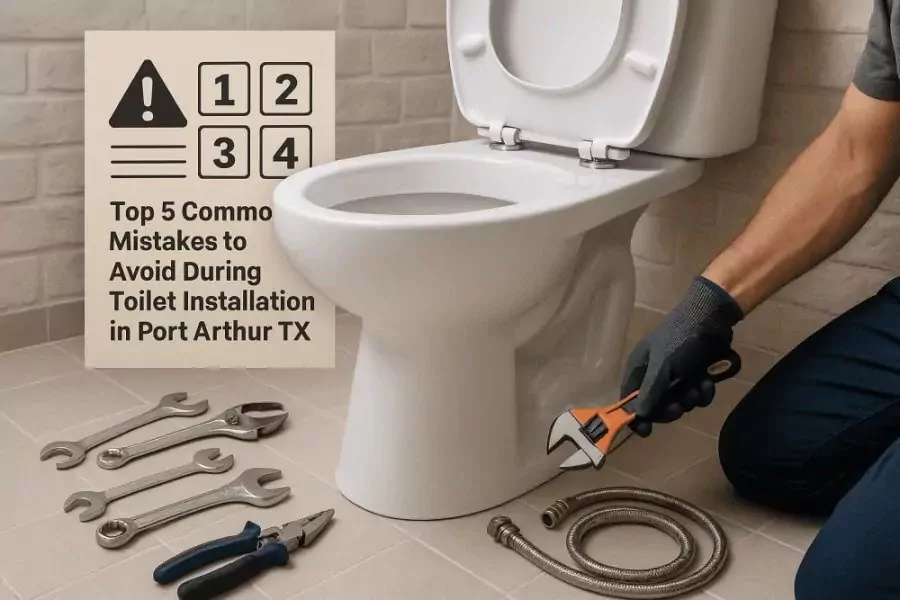
Smart homeowners know that a smooth toilet installation in Port Arthur TX starts with planning, the right parts, and an eye for detail. From slab foundations to coastal humidity, our local conditions can magnify small errors into costly leaks or recurring clogs. Whether you are replacing an older unit or upgrading to a WaterSense model, avoiding common pitfalls saves time, money, and stress. Many DIYers rush through critical checks such as flange height, valve condition, and base leveling, only to face rocking bowls or hidden water damage later. If you want reliable performance and code-compliant results, learn the mistakes professionals see most often in Southeast Texas. For a quick reference and professional help, bookmark toilet installation Port Arthur TX and keep these best practices handy.
1. Overlooking the flange, wax ring, and subfloor during toilet installation in Port Arthur TX
The most common issue we find in Port Arthur homes is a flange that sits too low or is corroded, which prevents a proper wax ring seal. On slab foundations, a sunken flange can leave gaps that let sewer gas escape and wastewater seep under the base. Add our coastal humidity, and you have a recipe for mildew odors and stained grout lines. Before setting the toilet, confirm the flange is level with the finished floor or use a proven flange extender. Replace rusted closet bolts and choose a wax ring thickness that matches your flange height for a reliable, long-term seal.
We recently revisited a home where a newly installed toilet rocked slightly, and the homeowner noticed faint moisture after showers. The culprit was not the shower, but a flange sitting 1/4 inch below tile due to an added underlayment, causing the wax ring to barely compress. After adding an extender, new bolts, and a thicker ring, the rocking stopped and the odor disappeared. In older homes around Jefferson County, we also see cast iron flanges with chipped edges that cannot hold a seal. When in doubt, upgrade damaged parts before setting the bowl to avoid callbacks and hidden water damage.
2. Overtightening or misaligning closet bolts in toilet installation in Port Arthur TX
It is tempting to crank down on the nuts to stop a wobble, but overtightening can crack the porcelain base or distort the wax ring. Misaligned bolts can also tip the toilet slightly, leading to a slow leak that is hard to spot until flooring is stained. The right approach is to dry-fit the toilet, confirm bolt alignment, and snug nuts gradually in an alternating pattern. Many pros aim for firm compression without forcing, checking for movement after each small turn. If movement persists, correct the cause with shims or flange repair, rather than more torque on the bolts.
We saw this in a Beaumont rental where a hairline crack developed weeks after a DIY installation, causing sudden leakage around the base. The installer had tightened one side far more than the other to fight a minor wobble. Our fix included new closet bolts, a fresh ring, composite shims, and a measured, alternating tighten. Consider these quick tips for accuracy and safety:
3. Ignoring shut-off valve and supply line issues during toilet installation in Port Arthur TX
Old angle stops and rigid supply lines are frequent failure points in Southeast Texas homes, especially where mineral buildup and corrosion occur. A stuck or weeping valve can turn a quick install into an emergency, and a brittle line can burst days later. Always test the shut-off, replace faulty valves, and upgrade to a braided stainless-steel line with the correct length and seal. While you are there, check fill valve operation and water pressure, which impacts noise and refill times. These small steps can prevent wasted water and surprise leaks that damage cabinets and baseboards.
In a Bridge City duplex, a partially seized gate valve would not fully close, leading to a slow drip after the new toilet was set. Swapping in a quarter-turn ball valve and a quality braided connector solved the problem and improved serviceability. For efficiency, consider pairing your replacement with a WaterSense-certified toilet to cut water usage without sacrificing performance. You can learn about savings and product options at the EPA WaterSense site here: EPA WaterSense toilets. Proactive replacement of aged valves and lines is a small investment that pays back in reliability.
4. Not leveling and sealing the base correctly in toilet installation in Port Arthur TX
A slightly uneven floor can cause a toilet to rock, even if the wax seal was perfect at first set. Over time, that movement compresses or breaks the seal and allows seepage, which invites odors, pests, and subfloor damage. Use composite shims to stabilize the bowl before final tightening, then trim them flush for a clean finish. Once the toilet is secure and level, apply a neat bead of premium silicone caulk around the base, leaving a small gap at the back for leak detection. Proper caulking helps meet hygiene expectations and local best practices by preventing mop water and spills from seeping under the base.
We encountered a Port Arthur remodel where the toilet felt solid at first but rocked slightly on one tile edge. The prior installer skipped shims and used minimal caulk, leading to a musty smell within a month. After re-setting with shims at two points and sealing the perimeter, the odor vanished and the finish looked professional. For general guidance on hygienic sealing, many pros follow recommendations aligned with modern plumbing codes, such as those seen in the Uniform Plumbing Code published by IAPMO: IAPMO code resources. Attention to level and seal is the difference between a short-term set and a durable installation.
5. Neglecting venting, drainage, and code checks in toilet installation in Port Arthur TX
Toilets rely on proper venting and clear drain paths; otherwise you may see slow flushes, gurgling fixtures, or recurring clogs. If you are moving a toilet or changing rough-in, confirm vent connections and slope meet current standards before closing walls. Measure your rough-in (10, 12, or 14 inches) to ensure the bowl fits without kinking the supply or cramping the flange. In older Orange and Beaumont area homes, we sometimes find offset flanges or long sweep turns that need correction for modern bowls. When in doubt, consult local code or a licensed plumber to avoid costly rework.
One renovation in Orange, TX revealed an undersized vent serving multiple fixtures, which starved the toilet of air and caused sluggish performance. After adding a properly sized vent path, the flush normalized and the customer stopped plunging. Homeowners can reference model code frameworks, such as the Uniform Plumbing Code. For a hassle-free, code-compliant experience, schedule professional help through our services page, explore our bathroom plumbing tips, or contact us to discuss your project before you buy parts. A brief pre-check often prevents days of frustration and protects your warranty.
By avoiding these five pitfalls, you protect your home from leaks, odors, and premature repairs while ensuring a clean, code-conscious finish. Check flange height, align and tighten bolts carefully, upgrade aging valves and supply lines, level and seal the base, and confirm venting and drainage. When questions arise, lean on credible resources like EPA WaterSense and the IAPMO code library. For expert help, 409 Plumbing serves Port Arthur, Orange, Beaumont, and Bridge City with prompt, professional service. Visit our services, browse our plumbing tips, or contact us for a no-pressure consultation. We are ready to help you install it right the first time.
Frequently Asked Questions About Toilet Installation
Do I need a permit for toilet installation in Port Arthur TX?
For a straightforward like-for-like toilet swap, many jurisdictions do not require a permit, but requirements can vary by scope. If you are relocating the toilet, altering drainage or venting, or opening walls, permits and inspections may apply. Port Arthur and surrounding Jefferson County follow standards that align with model codes, and enforcement can differ by project type. When selling a home, unpermitted plumbing work can raise issues during inspection or appraisal. To be safe, check with your local building department or ask a licensed contractor to confirm. A quick call up front can save you from delays or rework later.
How long does professional toilet installation usually take?
A standard removal and replacement typically takes 60 to 90 minutes when all parts and conditions are ideal. Add time if the flange is low, bolts are rusted, or the shut-off valve needs replacement. Leveling, shimming, and precise caulking also add a few minutes but drastically improve results. If there are drainage, venting, or subfloor issues, the visit can extend into several hours. Professionals arrive with repair parts on hand to handle most surprises without multiple trips. Planning for common fixes helps keep your project on time and on budget.
Which is better for our climate: wax or wax-free seals?
Both wax and wax-free seals work when installed correctly, but each has strengths. Traditional wax rings are cost-effective and create a reliable seal when flange height is right and movement is prevented. Wax-free options can be more forgiving to minor flange variations and may simplify resets without replacing the ring. In Southeast Texas, where humidity and occasional slab movement occur, correct flange height and stable, shimmed placement matter more than the material. If you expect to test-fit multiple times, a wax-free seal can reduce mess and waste. Your plumber can recommend the best choice based on your floor height, flange condition, and toilet model.
How do I choose the right toilet for a Port Arthur home?
Start with the rough-in measurement, then look for WaterSense-certified models that save water without sacrificing flush power. Consider bowl shape (elongated for comfort, round for small bathrooms) and height options for accessibility. In areas with harder water, a quality glaze and powerful rinse can reduce mineral buildup and cleaning time. Review independent test data and manufacturer specs for MaP flush performance ratings. Also think about noise levels if the bathroom is near bedrooms. If you want tailored advice, a licensed pro can match your needs, layout, and budget to the right model.
Registered Master Plumber Texas State Board of Plumbing Examiners
RMP #44702
Licensed and Bonded
Cities Serviced
409 Plumbing
Follow Us On
© 2026 409 Plumbing. All Rights Reserved.
Website Design and Hosting Provided by LocalBizBuzz,co