
24 Hour Service
Call 409-444-0066
Step-by-Step Process for Kitchen Sink Installation Beaumont TX: What to Expect
Master the simple steps for kitchen sink installation in Beaumont, TX, ensuring a smooth and hassle-free upgrade for your home.
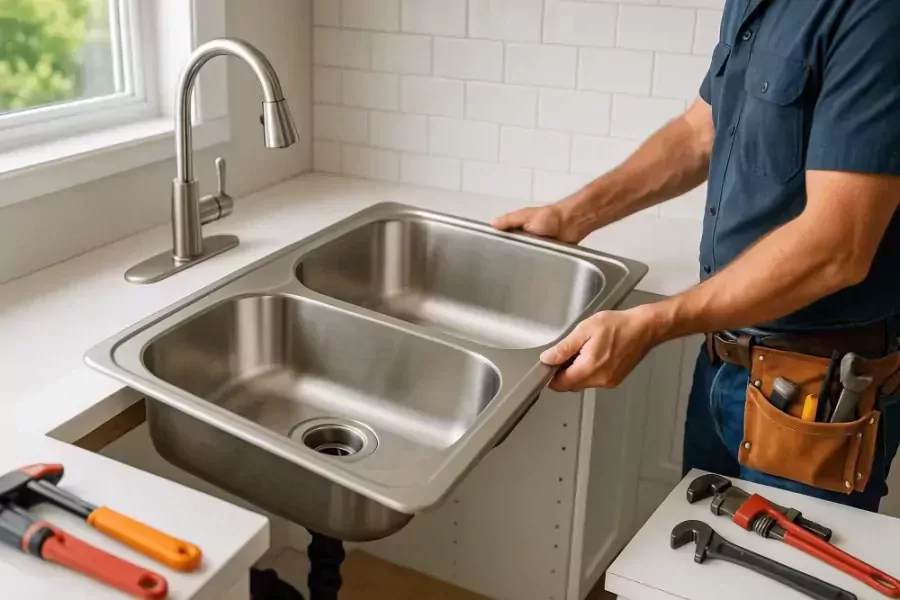
Are you considering a new kitchen sink installation in Beaumont, TX? If so, you're in the right place! Installing a kitchen sink can seem like a daunting task, but with the right guidance and preparation, it can be a smooth and rewarding experience. This blog will guide you through each step of the installation process, ensuring you know exactly what to expect. From gathering the necessary tools to tackling common challenges, we'll cover everything you need to make your kitchen sink installation a success. Let's dive into the essential steps that will empower you to take on this project with confidence.
1. Preparing for the Installation
Before you embark on your kitchen sink installation in Beaumont, TX, preparation is key. Start by selecting the right sink that fits your kitchen's design and your personal preferences. Consider the size, material, and style that will not only enhance your kitchen's aesthetics but also provide functionality. Common materials include stainless steel, porcelain, and composite, each offering unique benefits.
Next, gather your tools and materials. You'll need items such as a wrench, screwdrivers, a plumber's tape, a silicone sealant, and a bucket to catch any water during the installation process. Having everything on hand will prevent unnecessary delays and help keep the project organized.
Additionally, it's important to turn off the water supply to avoid any mishaps. Ensure you know where your shut-off valves are located, and if you're unsure, consult a plumbing professional. Proper preparation sets the stage for a seamless installation experience.
2. Removing the Old Sink
Once you're prepared, it's time to remove the old sink. Start by disconnecting the plumbing-this includes the water supply lines and the drain. Be ready with your bucket to catch any residual water that may spill out. Carefully unscrew the mounting clips that hold the sink in place.
As you detach the sink, be mindful of any caulk or adhesive that may be present around the edges. Use a utility knife to cut through any residue, ensuring that the countertop remains undamaged. If the sink is stubborn, gently rock it back and forth to loosen it from its position.
After successfully removing the old sink, clean the area thoroughly. This will prepare your countertop for the new sink and ensure a proper seal. Take this opportunity to inspect the plumbing for any signs of wear or damage that may need addressing before the new installation.
3. Installing the New Sink
With the old sink out of the way, it's time to install your new kitchen sink. Begin by applying a bead of silicone sealant around the edge of the sink cutout in the countertop. This will create a watertight seal and prevent any leaks. Carefully place the new sink into the cutout, ensuring it sits evenly and securely.
Next, secure the sink using the mounting clips provided. Follow the manufacturer's instructions to ensure a proper fit. Once the sink is secured, connect the plumbing. Start with the drain assembly, making sure to use plumber's tape on threaded connections to prevent leaks.
Finally, reconnect the water supply lines, ensuring they are tightly fitted. Turn the water supply back on and check for any leaks. If everything is in order, wipe away any excess sealant and admire your handiwork! Installing a new sink can significantly enhance your kitchen's functionality and look.
4. Troubleshooting Common Challenges
Even with careful planning, you may encounter challenges during your kitchen sink installation in Beaumont, TX. One common issue is misalignment of the sink, which can result in drainage problems or leaks. If you notice that the sink is not level, loosen the mounting clips and adjust the positioning before retightening.
Another challenge is dealing with old plumbing that may not fit your new sink properly. If you find that your existing pipes are too short or too long, consider using extensions or consulting a plumber for adjustments. It's important to ensure that all connections are secure to avoid future issues.
Lastly, if you're facing difficulties with the installation process, don't hesitate to seek professional help. Sometimes, it's best to rely on experienced technicians who can ensure everything is set up correctly. 409 Plumbing, located in Orange, TX, can provide expert assistance with your kitchen sink installation needs.
Installing a kitchen sink in Beaumont, TX, can be a rewarding DIY project if you approach it with the right knowledge and preparation. By following the step-by-step process outlined in this blog, you can tackle challenges with confidence and ensure a successful installation. Remember to gather all necessary tools, follow safety precautions, and don't hesitate to seek help if needed. For those looking for professional assistance, contact 409 Plumbing at 409-444-0066. We are here to help with all your plumbing needs in Beaumont and surrounding areas.
Frequently Asked Questions About Kitchen Sink Installation
1. How long does a kitchen sink installation take?
The duration of a kitchen sink installation can vary depending on your experience level and the complexity of the project. Generally, it can take anywhere from 2 to 4 hours for a DIY installation. However, if you're replacing plumbing or making significant adjustments, it could take longer. For those who prefer a stress-free experience, hiring a professional can significantly reduce this time.
2. What tools do I need for kitchen sink installation?
For a successful kitchen sink installation, you'll need a variety of tools. Essential items include a wrench for tightening fittings, a screwdriver for assembling parts, a utility knife for cutting caulk, and plumber's tape to ensure leak-proof connections. Having a bucket on hand is also advisable to catch any water that may spill during the process. Being prepared with the right tools can make the installation much smoother.
3. Can I replace my kitchen sink myself?
Yes, many homeowners can successfully replace their kitchen sink themselves, especially with the right guidance and tools. However, it's important to assess your comfort level with plumbing tasks. If you're unsure or encounter unexpected issues, consulting with a professional plumber can provide peace of mind and ensure a proper installation.
4. What if my new sink doesn't fit the existing plumbing?
If your new sink doesn't fit the existing plumbing, you may need to make some adjustments. This could involve using plumbing extensions, adjusting the height of the sink, or even rerouting some pipes. It's advisable to have a professional plumber assess the situation to make sure all modifications are done correctly and safely.

Registered Master Plumber Texas State Board of Plumbing Examiners
RMP #44702
Licensed and Bonded
Cities Serviced
409 Plumbing
Follow Us On
© 2026 409 Plumbing. All Rights Reserved.
Website Design and Hosting Provided by LocalBizBuzz,co