
24 Hour Service
Call 409-444-0066
DIY Toilet Seal Replacement Tips for Homeowners
in Orange TX
Simple steps for homeowners in Orange, TX to replace toilet seals and prevent leaks without hiring a plumber.
If you have noticed a musty odor, a rocking toilet, or water pooling at the base, it might be time to tackle toilet seal replacement Orange TX on your own. A failing wax ring can allow leaks that damage subfloors and invite mold, especially in the humid Gulf Coast climate. This guide walks Orange, Beaumont, and Bridge City homeowners through clear steps, practical tips, and local insights to get a lasting, watertight seal. We will cover what causes toilet seals to fail, the tools and materials you need, and the right way to reset your toilet for a reliable fix. You will also learn how to avoid common mistakes that lead to repeat repairs and when it is best to call a professional. Whether you are a first-time DIYer or a seasoned homeowner, the steps below will help you save time, money, and frustration.
Why toilet seal replacement Orange TX matters and how to spot a failing seal
The toilet seal, often a wax ring or wax-free gasket, creates a gas- and water-tight connection between the toilet outlet and the flange on your bathroom floor. In Orange TX, seasonal humidity, foundation settling, and occasional hurricane-related movement can loosen closet bolts or stress the flange, weakening that seal. Watch for warning signs like rocking when you sit, water stains around the base, or a faint sewer gas smell that persists after cleaning. Discoloration of grout, soft spots in vinyl near the bowl, and ants attracted to moisture are also easy-to-miss red flags. Addressing these symptoms early can prevent warped subflooring, damaged drywall below, and higher water bills due to unnoticed seepage.
Local conditions make fast action even more important. Older homes in Orange, Beaumont, and Bridge City may have cast-iron flanges or uneven tile that complicate the seal, while mineral content in the water can harden wax over time. A quick test is to place towels around the base and flush several times, checking for fresh moisture that suggests a leak path. You can also add a few drops of food coloring to the bowl and see if tinted water appears at the base after multiple flushes. For broader leak awareness, see the EPA WaterSense guidance on finding household leaks at EPA WaterSense, and make toilet seal checks part of your seasonal home maintenance routine.
Tools and materials for toilet seal replacement Orange TX
Before you start, gather the right tools to streamline the job and avoid mid-project trips to the store. Most homeowners will need an adjustable wrench, a putty knife, a sponge, rags or shop towels, a small bucket, a hacksaw for stubborn closet bolts, and a new water supply line if the current one is aged. For materials, choose either a standard wax ring, an extra-thick wax ring for low flanges, or a wax-free gasket if you prefer a cleaner install and easier resets. Have new closet bolts with washers and nuts, flange repair spacers or a repair ring if the flange is damaged or recessed, and a level to confirm the toilet sits flat. When in doubt on product selection, consult a reputable how-to resource like Family Handyman for a step-by-step overview or check code-compliant guidance from IAPMO if you suspect flange height issues.
Choosing between wax and wax-free gaskets often comes down to preference, temperature swings, and flange height. Wax rings are time-tested, inexpensive, and form a reliable seal when installed once and left undisturbed, but they cannot be repositioned if you mis-seat the toilet. Wax-free options, often with rubber or foam components, allow resets and can be helpful if you need to dry-fit multiple times to align bolts on uneven floors. In areas like Orange TX where slabs sometimes settle slightly, having flange spacers on hand can compensate for low flange height and prevent over-compression of the ring. If your closet bolts are corroded or spin freely in the flange slots, replace them rather than trying to reuse or force them. Keeping a new braided stainless steel supply line ready is smart insurance against future drips at the shutoff or fill valve.
Step-by-step toilet seal replacement Orange TX guide
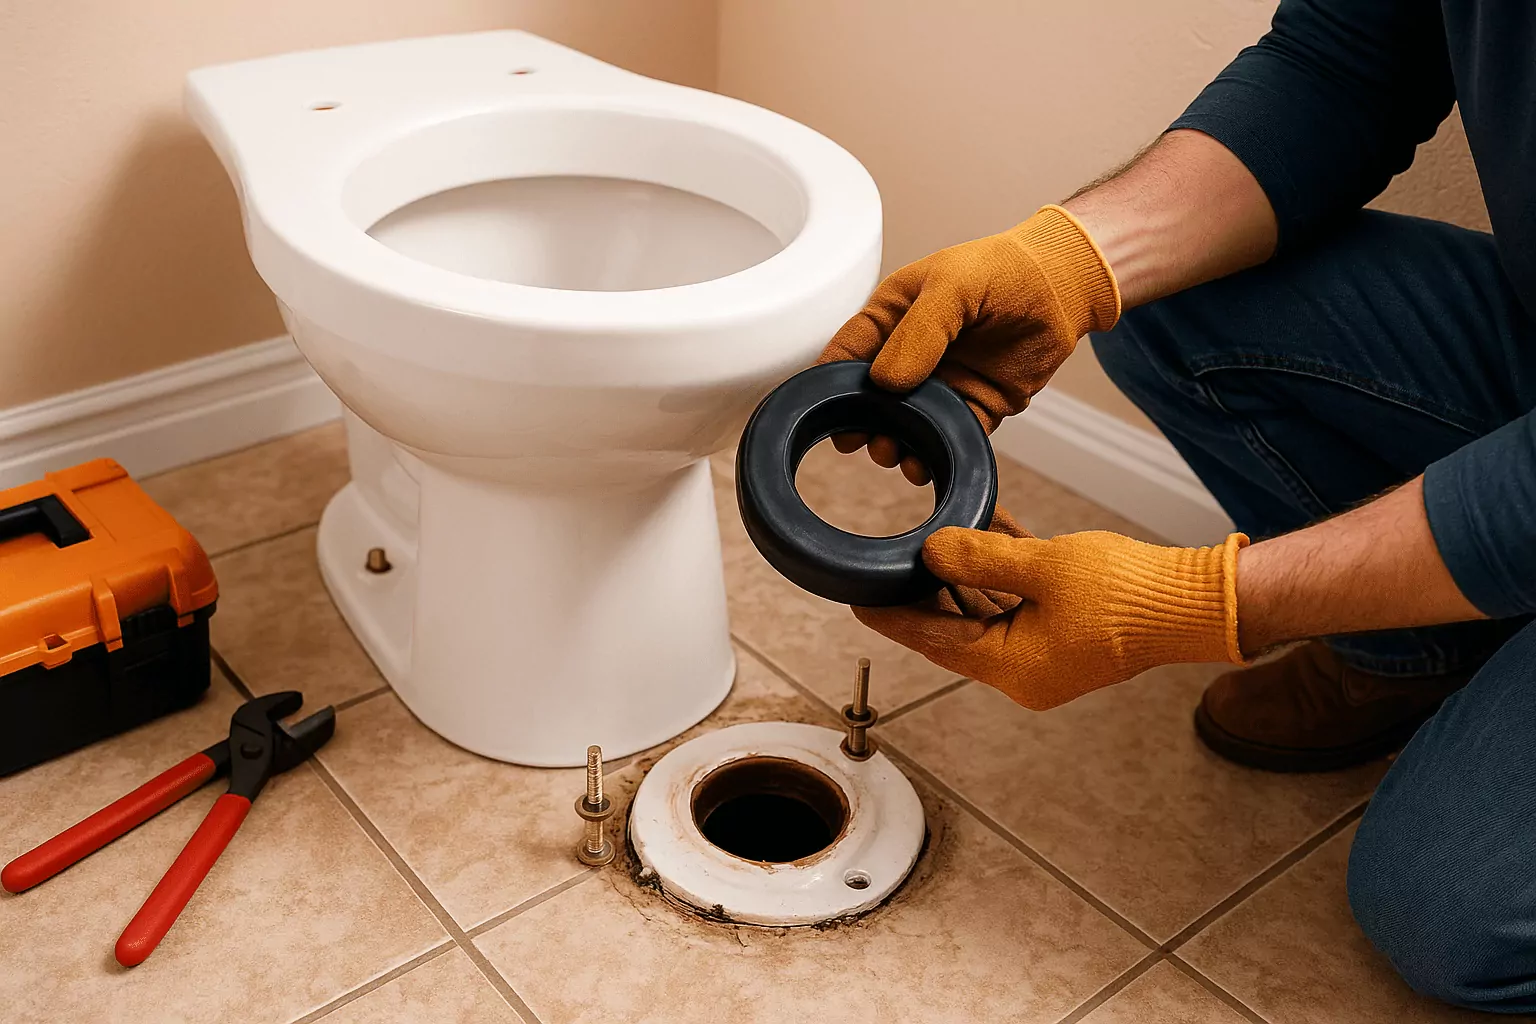
Start by turning off the shutoff valve, flushing to empty the tank, and sponging out remaining water from the tank and bowl into a bucket. Disconnect the supply line at the fill valve and the shutoff, then remove the bolt caps and loosen the closet bolt nuts; if corroded, carefully cut the bolts with a hacksaw. Rock the toilet gently to break the old seal and lift straight up, placing it on a towel or cardboard to avoid scratching the floor. Scrape the old wax from the flange and toilet horn with a putty knife, and inspect the flange for cracks or low height; add spacers or a repair ring if needed to bring the sealing surface level with the finished floor. Set new closet bolts in the flange slots, center the new ring or gasket per manufacturer instructions, and align the toilet over the bolts before lowering it straight down for an even, no-twist seat.
Once the bowl is seated, press down with your body weight and hand-tighten the nuts evenly, alternating sides to avoid tilting the toilet; then snug them carefully without over-tightening. Trim excess bolt length and pop on the caps, reconnect the supply line, and turn on the water to fill the tank while checking for drips at both ends of the line. After the first fill, flush several times, then run a bead of caulk around the base, leaving a small gap at the back for leak detection if desired. Recheck bolt tightness the next day after the toilet settles, and verify the bowl does not rock; use shims under the base if necessary to achieve perfect stability before final caulking. If you encounter persistent rocking, recurring moisture, or a severely damaged flange, consider a professional evaluation to protect your subfloor and finish surfaces.
With the right tools, a careful approach, and local know-how, homeowners can successfully complete toilet seal replacement in Orange TX and prevent costly water damage. Focus on stable seating, proper flange height, and even bolt tightening to create a durable, leak-free connection. Use high-quality materials, replace aging supply lines, and do multiple flush tests before caulking to confirm success. If anything feels off or your flange is damaged, it pays to get a professional opinion before small issues become major repairs. For more plumbing insights, explore our blog, learn about our plumbing services, or get personalized help via our contact form. When you are ready for expert assistance in Orange, Beaumont, or Bridge City, call 409 Plumbing at 409-444-0066 for friendly, local support.
Resources About Toilet Seal Replacement
Frequently Asked Questions About Toilet Seal Replacement
How do I know I really need a new toilet seal?
Common indicators include water appearing at the base after flushes, a faint sewer gas odor that lingers, or a toilet that rocks when you sit down. You might also spot stained grout or swelling in adjacent baseboards from repeated moisture exposure. If you perform the towel or food-coloring test and see fresh moisture, the seal is suspect and needs attention. In Orange TX, humidity can mask slow evaporation, so leaks may be subtle until floor damage appears. Addressing the problem early prevents subfloor rot and helps you avoid more invasive repairs later.
Is wax or wax-free better for homes in Orange, Beaumont, and Bridge City?
Both options can deliver excellent results when properly installed, so your choice often depends on flange height, installer preference, and whether you may need to reset the toilet. Wax rings are affordable and seal well, but they are single-use and punish misalignment because you cannot reseat them once compressed. Wax-free gaskets allow test fits and are cleaner to handle, which many DIYers appreciate. In slab-on-grade homes where the flange is sometimes slightly low, an extra-thick wax ring or a wax-free ring with integrated spacers can solve height issues. Check manufacturer guidance and local code considerations through sources like IAPMO to confirm a safe, compliant fit.
Can I reuse my existing closet bolts and water supply line?
It is best to replace closet bolts when you replace the seal, especially if they show rust, deformation, or spin in the flange slots. Fresh bolts ensure even clamping pressure and help prevent rocking that can compromise the new seal. Likewise, a new braided stainless steel supply line is inexpensive insurance against leaks at the shutoff or fill valve. If your current line is older, kinked, or shows corrosion at the ferrules, replacement is a smart choice during the same project. Proactive upgrades now can save you a service call and potential water damage later.
How long should toilet seal replacement take, and what if I hit a snag?
For many homeowners, the process takes about one to two hours, including careful cleanup and testing. The biggest time variables are removing stubborn bolts, cleaning old wax thoroughly, and addressing a low or damaged flange. If you discover a cracked flange, missing sections, or severe movement in the toilet after reinstallation, a repair ring or spacer kit can often help. Persistent rocking, recurring moisture, or damaged subflooring are warning signs to consult a pro for a secure, code-compliant fix. When in doubt, reach out to a licensed plumber to protect your flooring and ensure a lasting result.
Registered Master Plumber Texas State Board of Plumbing Examiners
RMP #44702
Licensed and Bonded
Cities Serviced
409 Plumbing
Follow Us On
© 2026 409 Plumbing. All Rights Reserved.
Website Design and Hosting Provided by LocalBizBuzz,co